
Dog house tutorial! A budget friendly way to keep your dogs out of the weather
We are always looking for creative ways to keep our dogs warm during the cold winter months. Living in Southern Utah has certainly given us a milder climate compared to living up North and I won't complain one bit!
We all know that plain ol' plastic dog houses aren't the most durable things, especially when you have hounds! Believe me, we tried that once! So, we wanted to come up with another option that was not only durable, but warm and cozy. Our dogs have loved their barrels since day one!
The way that we have been able to make these cost effective for us is the fact that we have been able to find our smaller barrels on sites such as ksl.com, the Facebook Marketplace, and classifieds. We got the white one below for $15!
For our larger barrels, we have been fortunate enough to find them very cheap. We get empty ones from them and wash them out. Generally they've had soap or iodine in them. If you have a dairy or a company that sells product in these drums in your area, they would be a good place to start.
For those of you who aren't sure if there are any dairies in your area here is a link to one from Walmart.

Now onto the fun part! Creating the dog house!
First things first... gather your materials and tools! I've listed them below:
-
35 gallon barrel
-
55 gallon barrel
-
Drill-- you may be seeing a pattern.... we loveMilwaukee tools! We found this amazing resource online that talks all about different drills + selecting your own too: https://happydiyhome.
com/best-cordless-screwdriver/ -
Long Screws (1 1/2-2")
-
A section of a board
-
Your helpers!
The first step in creating your house is cutting the doorways! For the large barrel, cut the entire top out leaving the lip on.
For the 35 gallon barrel, measure a section that is 12x12" and cut the square out.
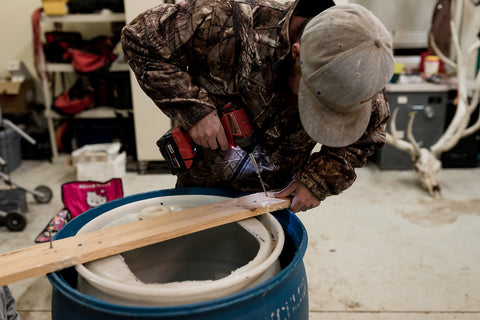
Next, set the small barrel inside the large one and screw your board to the top going through the big one too. This helps you know where to place the screws after you add the insulation. It rises quickly so you have to work fast once you pour it in.

Remove the screws from the big barrel keeping the board attached to the smaller one and pull it out.

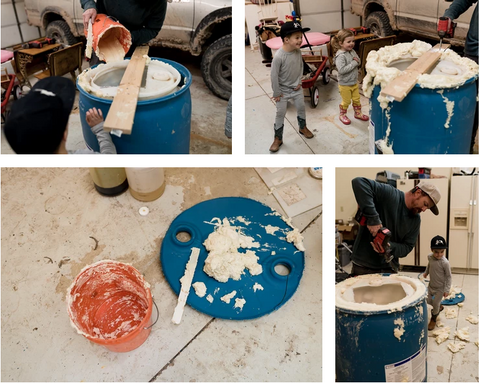
Next, you will mix your insulation per the instructions on the bottle and pour it into the bottom of the large barrel.

Let the insulation rise for about ten seconds so that the bottom has a good layer and quickly place the small barrel back in and screwing it down so that it doesn't float up as the insulation rises.
The first batch generally won't make it all the way to the top. Wait a few minutes to see how high it gets and mix up another batch of insulation and pour it down the sides between the two barrels. This part can get messy! Luckily no one got it on their clothes!
As it starts to rise it may come over the top (this is the kids favorite part)! Quickly scrape it off and you can use the lid you cut out to put the excess on. It hardens fast so you won't have to worry about it flying everywhere!
Once it is done and feels like styrofoam, remove the board and use your Sawzall to trim it down to the edge of the barrels!
When it is all done we will screw a board to the top of the barrel and put a rubber flap on it for the door and add lots of straw. We generally don't add rubber for the puppies because they chew it off!

Then clean up the mess with your crew and you are done!